Welcome to the world of soy candle crafting! This guide is perfect for those who want to make homemade candle gifts or explore DIY candle ideas by turning your creative passion into beautiful, fragrant candles.
Making soy candles is not just a hobby; it’s a way to make your space special and also give meaningful gifts.
With basic tools and creativity, you can make stunning candles. They look great and make your home smell wonderful.
This guide will help you pick the right wax and add your favorite scent, showing you how to become a candle maker.
Key Takeaways
- Learn the basics of soy candle making
- Make personalized, eco-friendly candles
- Get skills for unique homemade candle gifts
- Know the key materials and techniques
- Find creative DIY candle gifting ideas
Introduction to Soy Candles
Soy candles are both exciting and rewarding to make in addition they are a clean, eco-friendly choice.
What Are Soy Candles?
Soy candles are made from natural soybean oil, a clean-burning alternative to paraffin candles. They are eco-friendly, bringing warmth and fragrance to your home.
Benefits of Using Soy Wax
- Longer burn time than traditional candles
- Clean and non-toxic burning
- Easy to clean with hot water and soap
- Supports American farmers with soybean oil
Why Make Your Own?
Making soy candles at home is a fun and rewarding process. In case you are thinking of presenting your candles as a gift, you can:
- Choose scents that match your loved ones’ preferences.
- Control the ingredients used.
- Save money compared to buying candles.
- Enjoy a creative and fun hobby.
By giving a hand-crafted soy candle to a friend or family you are presenting them with a thoughtful gift that also shows your unique talents.
The possibilities for unique candle designs are endless, making this craft both enjoyable and meaningful.
Essential Supplies for Candle Making
Starting your candle-making journey needs the right tools and materials. Whether making candles for loved ones or trying a new hobby, getting the essential supplies is key to success.
Materials You’ll Need:
- Soy wax flakes (natural, clean-burning, and easy to work with)
- Cotton or wood wicks (size depends on the container diameter)
- Wick stickers or hot glue (to secure the wick)
- Glass jars or metal tins (heat-resistant and non-flammable)
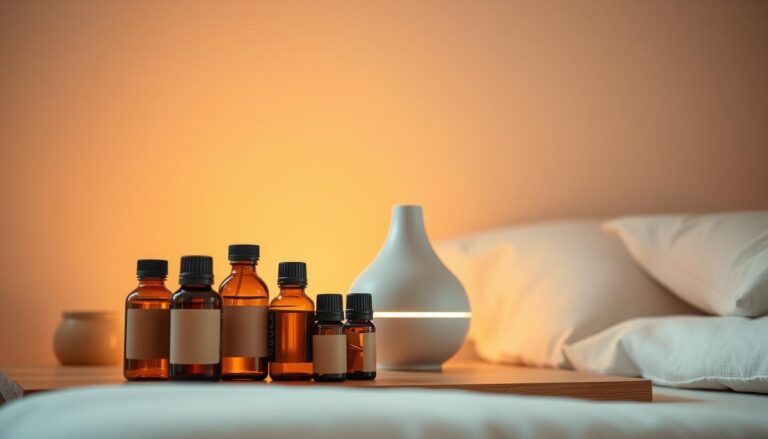
- Fragrance oil (optional, but use only candle-safe oils)
- Essential oils (if you prefer natural scents)
- Dye chips or liquid dye (optional for colored candles)
- Double boiler or microwave-safe container (to melt wax)
- Pouring pitcher (to transfer melted wax)
- Thermometer (to monitor wax temperature)
- Stirring stick or chopstick (to mix fragrance and color)
- Clothespin or wick holder (to keep the wick centered)
Step-by-Step Guide for making Soy Candles:
Prepare Your Work Area
- Cover your workspace with parchment paper or newspaper to prevent messes.
- Gather all materials so they’re easily accessible.
Safety Precautions
When working with wax and oils, safety comes first. Here are some important steps to take:
- Wear long sleeves and protective gloves
- Work in a well-ventilated area
- Keep a fire extinguisher nearby
- Use a dedicated workspace away from children and pets
Tools and Equipment Setup
Get all your candle-making supplies ready before you start. The right tools make the process fun and easy.
- Double boiler or dedicated wax melting pot
- Digital thermometer
- Measuring cups and scales
- Stirring utensils
- Protective covering for work surface
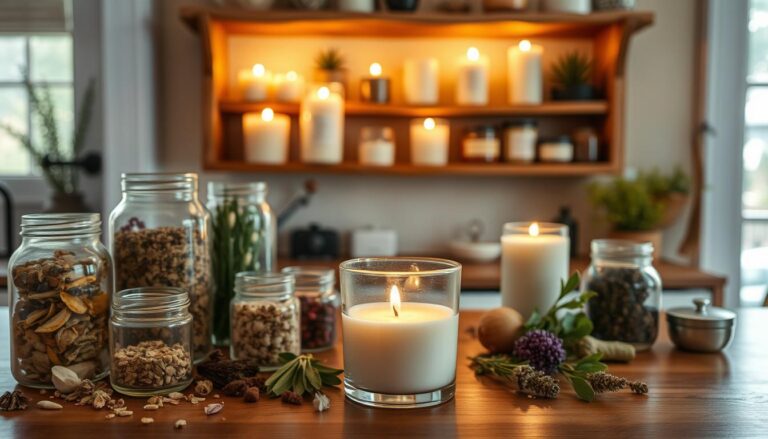
Creating a Candle-Making Station
Make a workspace that’s efficient and clean. Cover your surface with newspaper or a tablecloth. Place your tools where you can easily reach them. This makes your workspace comfortable and organized.
Pro tip: Position your melting equipment near a power outlet. Choose a flat, stable surface that won’t be disturbed for hours while your candles cool.
Measure and Melt the Wax
- Measure the wax by filling your container twice with soy wax flakes (it melts down to roughly half).
- Use a double boiler or microwave to melt the wax:
- Double Boiler Method: Place wax in a heatproof pitcher over a saucepan with water. Stir occasionally until melted.
- Microwave Method: Heat in 30-second intervals, stirring in between, until fully liquefied.
Recommended Melting Methods
You can melt soy wax in two ways: double boiler or microwave. The double boiler method is best for even heating.
- Double Boiler Method:
- Use a dedicated wax melting pot
- Heat water in bottom pot to indirectly heat wax
- Maintain steady temperature around 185°F
- Microwave Method:
- Use microwave-safe container
- Heat in 30-second intervals
- Stir between heating cycles
Monitor the Temperature
- Use a thermometer to check the wax temperature:
- For fragrance oils: Add scent when the wax cools to 130-140°F (54-60°C) to prevent burning off the aroma.
- For dye: Add when the wax is fully melted and stir until evenly mixed.
It’s key to control the temperature when making soy candles. Use a thermometer to check the wax’s temperature.
| Wax State | Temperature Range | Action |
|---|---|---|
| Melting Point | 185°F (85°C) | Begin melting process |
| Pouring Temperature | 135°F (57.2°C) | Ready to add fragrance and pour |
Tips for Even Melting
For smooth results, follow these tips. Stir gently and avoid direct heat to prevent wax from burning.
- Use 16 ounces (454 g) of soy wax for your project
- Stir frequently during melting
- Keep heat low and consistent
- Remove from heat when fully melted
Mastering these melting techniques will help you make stunning candles for special occasions. They will look and smell amazing.
Prepare the Wick and Container
- Attach the wick to the center of your jar using a wick sticker or hot glue.
- Use a clothespin or wick holder to keep the wick upright and centered.
Choosing the Right Type of Wick
Choosing the right wick is crucial for even burning. Here are some options:
- Cotton wicks: Versatile and reliable
- Wood wicks: Create a unique crackling sound
- CD 18 cotton wicks: Standard size for most containers
Add Fragrance and Mix
- If using essential oils for your candles, add 6-10% of the total wax weight (e.g., 1 oz per 1 lb of wax).
- Stir gently but thoroughly for 1-2 minutes to ensure even scent distribution.
When to Add Fragrance Oils
Adding fragrance to your soy candles is all about timing. Pour in your scent when the wax hits 185°F (85°C). This temperature makes sure the fragrance sticks well, giving a strong scent and lasting longer.
Achieving the Perfect Color
Color makes your candle gifts special. Think about these options:
- Liquid candle dyes for bright, even colors
- Natural pigment powders for soft, earthy shades
- Mica powders for shiny, metallic looks
Mixing Techniques for Maximum Impact
Blend your fragrances and colors carefully. Here’s how:
- Stir fragrance oils for 2 minutes to mix well
- Add color slowly, testing a little at a time
- Keep stirring to avoid uneven color
With these tips, you’ll make beautiful homemade candle gifts. They show off your creativity and care.
Pour the Wax
- Slowly pour the wax into your container, leaving about ½ inch of space at the top.
- Keep the wick centered and let the wax cool at room temperature.
Making unique candles needs precision and care. This stage turns melted wax into a beautiful, personalized candle. Knowing the right techniques helps you make candles that look professional and creative.

Selecting the Right Container
Your container choice can make your candles stand out. Think about these things when picking your vessel:
- Heat resistance of the material
- Aesthetic appeal and design
- Size appropriate for your intended use
- Material compatibility with soy wax
Pouring Techniques
Mastering the pour is key for perfect candles. Follow these steps for a smooth pour:
- Wait until wax reaches 135°F (57.2°C)
- Pour slowly and steadily
- Leave 1/2 inch (12 mm) space from the top
- Avoid sudden movements during pouring
Avoiding Common Mistakes
| Mistake | Solution |
|---|---|
| Pouring at incorrect temperature | Use a reliable thermometer |
| Overfilling container | Leave recommended space at top |
| Rapid pouring | Pour slowly to prevent air bubbles |
By following these tips, you’ll make stunning candles that show your personal style. Remember, patience and attention to detail are crucial in candle making.
Allowing the Candle to Set
Making beautiful soy candles needs patience. You must pay close attention to the cooling and curing process. This ensures your DIY candle gifts turn out top-notch.
Right after pouring, your candle needs a calm place to set. Here are the essential steps for the best results:
- Allow candles to cool at room temperature
- Keep candles away from direct sunlight or drafts
- Place on a level, heat-resistant surface
- Avoid moving or disturbing the candles during initial cooling
Cooling Times and Conditions
The cooling process usually takes 8 to 12 hours. In warmer months, it might be quicker. The ideal cooling temperature is between 49-57°C (120-135°F). This prevents sinkholes and ensures a smooth surface.
Importance of Cure Time
Curing is key for a strong fragrance. For the best results, let your soy candles cure for 2 weeks. At least, give them 4-5 days to fully develop their scent. This time lets the wax and fragrance oils bind well, giving a consistent and lasting scent.
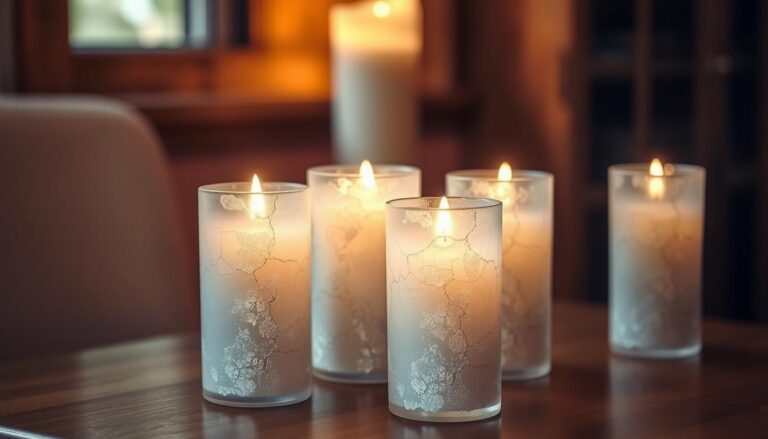
Identifying When It’s Ready
Your candle is ready when it looks smooth and feels solid. For DIY candle gifts, look for these signs:
- No wet or soft spots on the surface
- Consistent color throughout
- No visible shrinkage or separation
- Firm to the touch
Remember, patience is crucial in candle making. Waiting for your candle to set properly will make it perfect for gifting or personal use.
Trimming Wicks and Finishing Touches
Making custom candles for gifts needs careful attention in the end. These steps turn your candles into beautiful presents that will wow your loved ones.
Getting your candle just right involves a few key steps. These steps make your candle look and burn better.
The Perfect Wick Length
Keeping the wick right is key for a good burn. Here’s what to do:
- Trim the wick to 1/4 inch (6 mm) before each use
- Remove any excess wick debris to prevent uneven burning
- Check wick length regularly to maintain consistent flame
Adding Decorative Elements
Make your candles special with creative touches:
- Consider adding dried flowers or herbs to the wax surface
- Use decorative ribbons or twine around the container
- Create custom labels that reflect the candle’s fragrance
Labeling Your Candles
Good labeling makes your candles look like a pro made them. Include these important details:
| Label Component | Recommended Information |
|---|---|
| Fragrance Name | Specific scent description |
| Burn Time | Estimated hours of burn |
| Safety Instructions | Burning and handling guidelines |
| Date Created | Batch or production date |
By focusing on these details, you’ll make candles that are stunning and well-made. Your hard work will show in every candle you create.
Common Mistakes to Avoid
Making handmade candles for special occasions needs skill and care. Even pros can make mistakes that ruin their soy candles. Knowing these issues helps make perfect candles every time.
When making soy candles, some big mistakes can mess up your work. Spotting and avoiding these errors boosts your candle-making skills. It also makes sure your candles look great.
Overheating the Wax
Keeping the wax at the right temperature is key. If it gets too hot, you’ll face big problems:
- Discoloration of the wax
- Reduced fragrance quality
- Potential wax degradation
Scent Load Guidelines
Fragrance is a tricky thing in candle making. Not following the right guidelines can lead to bad results:
| Fragrance Load | Potential Issues |
|---|---|
| Too Low | Weak scent throw |
| Too High | Separation, fire hazards |
Check out this guide on how to mix fragrance oils appropriately.
Underestimating Cure Time
Being patient is important when making candles for special occasions. Soy candles need 48 hours to cure. Rushing this can cause:
- Inconsistent fragrance distribution
- Poor burn performance
- Uneven melt pools
Avoiding these mistakes will make your soy candle-making better. You’ll create candles that impress and delight.
Experimenting with Different Styles
Ready to take your soy candle making to the next level? Creative candle projects offer endless possibilities for expressing your artistic side.
By exploring unique candle designs, you’ll transform simple wax into extraordinary works of art that capture imagination and delight the senses.
Crafting exceptional candles goes beyond basic techniques. The world of candle making is rich with opportunities to create stunning, personalized masterpieces that stand out from ordinary designs.
Soy Wax Varieties
Soy wax comes in different types for your candle-making. Each type has its own special features:
- Golden Brands 464 Soy Wax: Most popular for beginners
- EcoSoya CB-Advanced Soy Wax: Great for smooth finishes
- Golden Brands 454 Coconut Soy Wax: Provides excellent scent throw
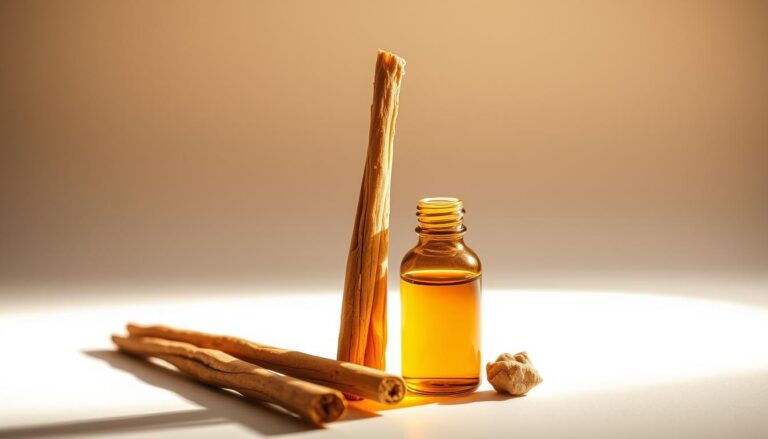
Fragrances and Dyes
Make your candles special with the right fragrances and colors. Consider these:
- Fragrance oil usage: Approximately 7% of total wax weight
- Essential oils: More expensive but natural alternative
- Dye options: Liquid or solid colorants available
Pro tip: Always use heat-safe containers and a reliable thermometer for safe candle making. Paying attention to detail will make your candles beautiful and enjoyable for everyone.
Storing Your Soy Candles
Making homemade candle gifts needs careful attention at every step, including storage. Keeping your candles in good shape means they stay beautiful and smell great.
- Choose a cool, dry spot away from sunlight
- Keep the room temperature between 65-75°F
- Avoid places with high humidity or heat
- Store containers upright
Best Practices for Storage
Your homemade candles need special care. Store them in a place with a steady temperature and little light. Ceramic or glass containers are best for keeping the wax safe.
Maintaining Fragrance Strength in Soy Candles
To keep your candles smelling strong, store them in airtight containers. This stops the scent from fading and keeps the oils fresh.
Your candles will smell amazing when you light them.
Protecting from Damage
Store candles separately to avoid damage. Use soft cloth or bubble wrap to protect them. This keeps them looking new and prevents chips or cracks. Following these steps will help your candles stay in top condition.

Sharing Your Candles with Others
Turning your candle-making hobby into a way to connect with others is exciting. Your soy candles can be special gifts that show your creativity and care.
Creative Gifting Ideas
DIY candle gifts can make giving presents even better. You can make candles that fit the person’s taste:
- Seasonal scents for holiday gifts
- Customized colors matching home decor
- Themed candles for special occasions
- Wellness-inspired aromatherapy collections
Your Candle Making Journey Continues
Your soy candle making journey has reached a thrilling point. You’ve turned creating custom candles into a fun activity. Each candle you make shows off your creativity and personal style.
Making thoughtful candle gifts is more than just mixing wax and scents. It’s about mastering the art of candle making.
In this article, you’ve learned how to pick the right soy wax and experiment with fragrances.
Keep practicing to learn new ways to make your candles stand out and grow your skills. Remember to let your creativity flow into every candle you make and enjoy the process.
Related Article: Learn to make soy scented candles with citrus oils.