Welcome to the magical world of DIY candle making! Here you’ll find the perfect beginner’s guide to making homemade candles.
For nearly a decade, enthusiasts have been exploring this creative craft that transforms simple ingredients into beautiful, fragrant treasures.
Crafting homemade candles is more than just a hobby, it’s an art form that allows you to express your creativity while producing something both beautiful and functional.
With our making homemade candles tutorial, you’ll discover how to turn wax, wicks, and fragrances into stunning candles that can brighten any space.
So, whether you’re looking to create personalized gifts or add a unique touch to your home decor, our comprehensive DIY candle making instructions will guide you through every step of the process.
Let’s get into it.
Key Takeaways
- Learn the fundamental techniques of candle making
- Discover how to choose the right wax and fragrances
- Understand the importance of proper temperature control
- Create personalized candles for gifts or home decor
- Explore a fun and rewarding creative craft
Why Make Your Own Candles?
Learning to make candles at home opens a world of creativity and personal expression. It’s more than a hobby; it’s a journey of self-discovery and artistic innovation for beginners.
Candle making is a popular DIY craft, attracting younger people to artisanal products. Your candle making tutorial can turn a simple evening into a creative adventure.
Benefits of Homemade Candles
- Full control over ingredient quality
- Therapeutic crafting experience
- Personalized scent combinations
- Potential cost savings compared to store-bought candles
Customization Options
Easy candle making tips show endless personalization possibilities. You can craft unique scents that fit your mood or decor. Use 1 ounce of scent oil for every 1 pound of wax to play with fragrance levels.
| Customization Feature | Potential Options |
|---|---|
| Wax Type | Soy, Beeswax, Paraffin |
| Fragrance | Essential Oils, Synthetic Fragrances |
| Color | Natural Dyes, Synthetic Colorants |
| Container | Glass Jars, Ceramic Vessels, Vintage Containers |
Cost-Effectiveness
Starting your candle-making journey can be affordable. A basic kit has about 10 essential items. With practice, you’ll make high-quality candles at lower costs. This skill could even lead to a small business.

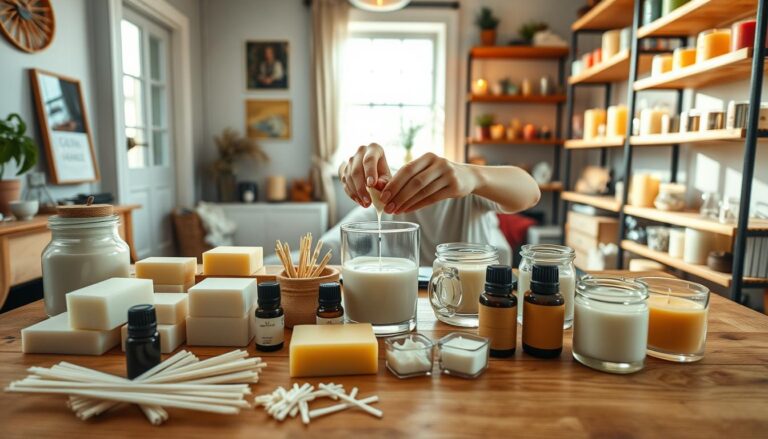
Essential Materials for Candle-Making
Starting your candle-making journey needs the right tools and supplies. Whether you’re new or want to improve, getting the right materials is key.
Types of Wax to Consider
There are various waxes for candle-making, each with its own benefits:
- Soy wax: Easy to melt, good for beginners.
- Paraffin wax: Great for strong scents.
- Beeswax: Natural, burns longer.
Tools and Equipment You’ll Need
Here’s what you’ll need for your candle-making kit:
- Double boiler for safe wax melting
- Digital thermometer
- Stirring utensils
- Containers or molds
- Wicks (cotton or wooden)
Safety Gear and Precautions
Keeping safe while making candles is important. Wear gloves, an apron, and work in a well-ventilated area. Always have a fire extinguisher ready and never leave melting wax alone.
| Safety Item | Purpose |
|---|---|
| Heat-resistant gloves | Prevent burns during wax handling |
| Apron | Protect clothing from wax spills |
| Safety glasses | Shield eyes from potential splashes |
Success in candle-making begins with safety and preparation. Take your time, follow the instructions, and enjoy making your own candles.
Choosing the Right Candle Wax
When you start making candles, picking the right wax is key. Each wax type has its own special qualities. These qualities can greatly affect your candle’s look and feel.
Paraffin Wax: The Traditional Choice
Paraffin wax is the most popular and affordable choice for making candles at home. It’s loved for its good scent and low cost. But, it can produce more soot and is made from petroleum.
- Most affordable wax option
- Excellent fragrance retention
- Can hold up to 10% fragrance load
- Produces more soot compared to alternatives
Soy Wax: The Eco-Friendly Alternative
Virgin coconut soy wax is a top choice for many. It burns cleaner and lasts longer than paraffin wax. It’s also great for beginners.
- Renewable and biodegradable
- Can hold up to 12% fragrance load
- Slower, cleaner burn
- Mid-range price point
Beeswax: Nature’s Premium Option
Beeswax is a natural and sustainable choice for candle making. It’s pricier but has a lovely scent and burns well.
- One of the oldest candle wax types
- Can hold 9-10% fragrance load
- Natural subtle scent
- Higher price point
Palm Wax: The Eco-Conscious Choice
Palm wax is a new eco-friendly option for candle makers. It’s made from a high-yield crop. It has a unique look and burns clean.
- Sustainable crop source
- Clean burning properties
- Unique crystalline texture
- Can hold up to 10% fragrance load
Gel Wax: Made from a mineral oil.
This is a new material that stays clear during the candle making process thus giving crafters the opportunity to make beautiful candles with a 3D feel to them.
Explore making candles with Gel Wax.
Fragrance and Color: Personalizing Your Candles
Exploring DIY candle making lets you turn simple wax into scented wonders. Your candles can show off your creativity, with fragrance and color being key.
These elements are crucial in the making homemade candles tutorial.
Types of Fragrance Oils
When picking fragrance oils, remember these tips:
- Use 1 ounce of scent oil per 1 pound of wax
- Recommended fragrance dosage ranges from 5% to 10% per kg of wax
- Some fragrances might require only a 1% dosage
Natural Dyes vs. Synthetic Colors
Your choice of color greatly affects the candle’s look. Here are your options:
| Color Type | Characteristics |
|---|---|
| Natural Dyes | Eco-friendly, subtle tones, limited color range |
| Synthetic Colors | Vibrant options, consistent results, wider variety |
Tips for Blending Scents
Making unique fragrances is all about trying new things.
Try mixing scents like lavender and vanilla, or citrus and mint. With over 400 fragrances available, you can find many safe options.
- Start with small quantities when mixing scents
- Keep detailed notes of your combinations
- Allow candles to rest 48 hours to 1 week for optimal scent development
Your DIY candle making journey is all about making something special.
Enjoy the process, and you’ll create candles that are not just beautiful but also fill your space with wonderful scents.
Step-by-Step Candle-Making Process
Making your own candles is a fun craft that mixes creativity with care.
Whether you’re watching a candle making tutorial video or following easy candle making tips, this guide will show you each step of the candle-making journey.
First, make sure your workspace is ready. Get all your materials and set up a neat, well-organized area.
Use protective materials like newspapers or disposable tablecloths to avoid wax spills.
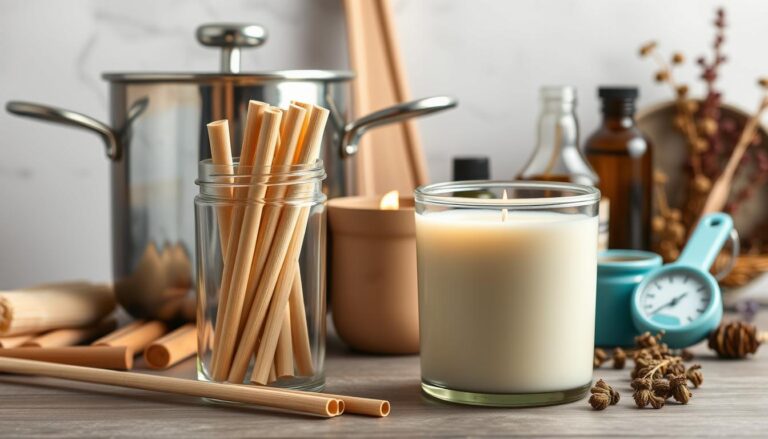
Melting the Wax Safely
Perfect candles need careful temperature control. We’ll use AAK’s 464 soy wax in flake form. Here are the important temperature tips:
- Optimal melting temperature: 185°F (85°C)
- Cooling temperature before pouring: 135°F (57.2°C)
- Use a double boiler for even heating
- Never heat wax directly on a stovetop
Adding Scents and Colors
When adding fragrances timing and measurement are key. This is also true for adding colors.
Follow these easy candle making tips for the best results:
- Measure fragrance oil precisely: 6% of wax weight (1 oz per 1 lb of wax)
- Add fragrance at 135°F for optimal scent retention
- Stir fragrance for approximately 2 minutes
- Use about ¼ tsp of dye per pound of wax for medium shade
Let your candles cure for 3-4 days before the first burn. This ensures the best scent throw and overall candle quality.
Pouring and Setting Your Candles
Mastering the pouring and setting stage is key in your homemade candle making tutorial for beginners.
This phase is crucial. It turns melted wax into beautiful, professional-looking candles.
Proper Pouring Techniques
When pouring your melted wax, follow these essential guidelines:
- Pour wax slowly to prevent air bubbles
- Leave approximately 1.5 inches of space from the container’s rim
- Maintain a consistent pouring temperature of 135°F (57.2°C)
- Use a wick-centering device to keep the wick perfectly aligned
Cooling Time Considerations
Patience is key in your candle-making journey. Let your candles cool and solidify completely.
The recommended cooling time is 24 hours.
Some candle makers suggest letting them sit overnight for optimal hardening.
Troubleshooting Common Issues
Even experienced crafters encounter challenges. Here are solutions to common problems:
- Air bubbles: Pour wax slowly and use a skewer to release trapped air
- Uneven surfaces: Ensure a flat, stable surface during cooling
- Wick placement: Use a centering device to keep the wick straight
- Wax shrinkage: Expect volume reduction when wax cools
With practice, you’ll create stunning homemade candles that rival professional products.
Remember, each candle is a unique creation in your handcrafted candle making tutorial.
Related article: 10 Tips for DIY Candle-Making.
Creative Candle Designs to Try
Once you’ve learned the basics of candle making, it’s time to get creative.
You can turn simple candles into beautiful pieces of art. DIY candle making lets you explore many design options.
Take your candle-making to the next level with new design techniques. These will make your candles truly stand out.
Layered Candles for Visual Appeal
Try making layered candles for a stunning look. Pour different colored wax in stages, letting each layer set a bit before adding the next. Here’s what to do:
- Choose colors that go well together or contrast each other
- Let each layer cool a bit before adding the next
- Pour slowly and carefully
- Keep the layers the same thickness
Adding Decorative Elements
Make your candles even more special by adding unique decorations. You can include:
- Dried flowers or herb sprigs
- Glitter for a sparkly look
- Small decorative objects
- Colored sand layers
Using Unique Containers
Choose unusual containers to make your candles even more unique.
Try using vintage teacups, mason jars, or even hollowed-out fruits. This will give your candles a distinctive look.
Remember, making beautiful candles takes patience and creativity. Each design shows off your unique artistic style!

Packaging and Gifting Your Candles
Your homemade candles are more than wax and wick. They’re personal creations waiting to be shared. The art of packaging and gifting turns your candle making into a heartfelt experience.
Creative Wrapping Techniques
Take your candle making to the next level with creative packaging. Here are some exciting options:
- Upcycled glass jars for eco-friendly presentation
- Fabric wrapping with elegant ribbons
- Tissue paper with personalized touches
- Vintage containers for unique charm
Labeling Your Candles
Professional labeling makes your candles special. Create custom labels with:
- Scent description
- Burning instructions
- Ingredients list
- Personal message or artwork
Gift-Basket Inspirations
| Theme | Complementary Items | Estimated Cost |
|---|---|---|
| Self-Care Package | Cozy socks, herbal tea, book | $35-$50 |
| Relaxation Basket | Lavender candle, bath salts, eye mask | $40-$60 |
| Romantic Gift | Wine, chocolates, matching candles | $45-$65 |
Personalization is key to memorable candle gifts. Your handcrafted candles become cherished memories with creative packaging.
Caring for Your Homemade Candles
After making your homemade candles, it’s important to take care of them so they stay beautiful and work well.
Your candle-making skills are not just for making, but also for keeping them in good shape.
Always trim the wick to about ¼” before lighting your candle. This helps it burn evenly and prevents soot.
When you first light it, let the wax melt all over for 1-3 hours. This stops the wax from burning in a tunnel.
For later uses, burn your candle for 3-4 hours. This lets the fragrance spread out evenly. Remember, the first burn is very important to avoiding tunneling.
Storing your candles right is also important.
Keep them in a cool, dry spot, away from sunlight. Most candles stay good for 12-16 months if stored well.
When there’s about ½” of wax left, it’s time to get a new candle. This prevents damage to the container and keeps burning safe.
Pro tip: Use a candle snuffer instead of blowing out the flame. This keeps the air clean and reduces soot. Following these tips will help your homemade candles last longer and keep your space cozy.
FAQ
How much does it cost to start making homemade candles?
You can make an 8 oz candle for $5 or $6 dollar that will cover for wax, wicks, fragrance, a double boiler, and containers. As you get better, you can buy more materials and tools to be more efficient.
What is the best type of wax for beginners?
Soy wax is great for beginners. It’s easy to work with, eco-friendly, and burns clean. It’s also biodegradable and makes less soot than paraffin wax.
How long do homemade candles typically last?
Candle life depends on wax type, size, and how you burn it. A 8-ounce candle lasts about 40-50 hours if used right. Trimming the wick and burning correctly can make it last longer.
Can I make candles with essential oils?
Yes, you can use essential oils in candle making. But, they have a lower flashpoint than synthetic fragrances. Use them carefully and at lower temperatures. Some essential oils might not smell as strong as candle fragrances.
What safety precautions should I take when making candles?
Safety is key in candle making. Work in a well-ventilated area and use a dedicated double boiler. Wear gloves and eye protection and have a fire extinguisher ready. Keep your space clean and away from flammable things. Never leave wax melting alone, and use a thermometer to check temperatures.
How do I prevent air bubbles when pouring candles?
Pour wax slowly and steadily at 135-145°F for soy wax. Tap the container gently after pouring to release air. Use a heat gun lightly over the surface to smooth out bubbles.
Can I add color to my homemade candles?
Absolutely! You can use candle dye chips, liquid dyes, or natural colors like mica powder. Start with a little color and add more until you get the shade you want. Different waxes might need different coloring methods, so try different things.
What are the best containers for homemade candles?
Glass jars, ceramic containers, and metal tins are best. Mason jars, vintage teacups, and heat-resistant glass are popular. Make sure the container is clean, heat-resistant, and has no cracks. Avoid plastic parts that might melt or react with hot wax.
How long should I let my candles cure before burning?
Let candles cure for 24-48 hours after pouring. Soy candles need 1-2 weeks to cure. This lets the wax and fragrance bind, making the scent stronger and the candle better.
Can I sell the candles I make at home?
Yes, you can sell homemade candles. But, check local laws first. You might need a business license, follow labeling rules, and get insurance. Also, make sure you follow safety rules for selling handmade products.